Thursday, December 31, 2009

2009: Glancing Back

This past year has been amazing.  Life has been breathed into my veins more firmly than in recent years.  I've discovered how much I love food and how much I know about it.  I've made friends, had fun, and learned a lot about myself.  There have been ups and downs, in both health and food.  I've joined twitter, facebook, foodbuzz (just the other day, in fact!), and loved every minute of it.  There have been many recipe group-type things, most significantly the Daring Bakers and the newly incarnated Daring Cooks.

It was about August that I started really blogging.  Not just health updates and here and there, but focusing on food and learning how flours work together.  How gluten free doesn't have to mean giving up anything.  How food has endless possibilities.


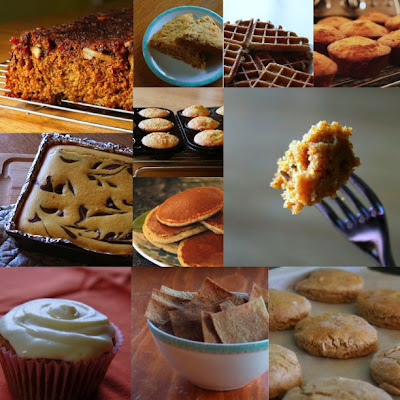
I know lots of people are doing lists, but I thought I'd share my Top 10 of 2009.  Recipes, that is.  These are the ones I've made the most, loved the most, enjoyed the most.  They are in no particular order and the size of their photo is just how that fit together, because I love them all =D.  Hope you enjoy!

Glorious Grain Muffins.  They are simply delicious.  We make them on an almost weekly basis, and all twelve always disappear in a hurry.  Also, they are filled to the rim with healthy grains!

Cinnamon Scones They're cinnamony, yummy and pretty simple.  They are regulars in my house and are perfect at any time of day!

Pumpkin Cupcakes They're pumpkin-y and yummy.  We had them for Thanksgiving instead of a pumpkin pie, and they went well!  Oh, and its got a maple cream cheese icing.  I might have eaten the leftovers of that straight out of the bowl (good thing it made a lot!).

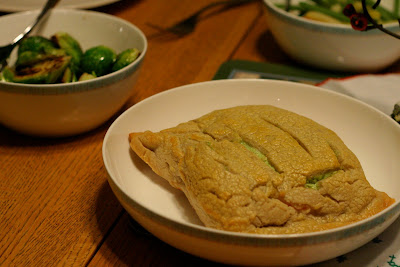
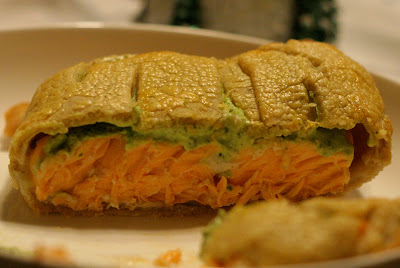
Surprise Corn Muffins These are fun.  You see, hidden inside this corn muffin is a delicious surprise.  I'm not going to tell you what lies within, but if you're curious, go check it out!

Pumpkin Chocolate Swirl Cheesecake Bars Inspired by a friend's glutenous version of these, I set out to make these not only gluten-free, but grain-free!  They turned out beautifully and I love their simultaneous lightness and richness.

3-Minute Pumpkin Cake I spent a lot of time coming up with these.  Its my incarnation of the microwave chocolate cake and I love it to bits!

Quinoa Flake Pancakes and Waffles These were also inspired by a friend.  They use one of my favourite foods - quinoa flakes - as a base, and have a richer more interesting taste!  I ate these for breakfast for a solid week.  They also reheat beautifully in the microwave!

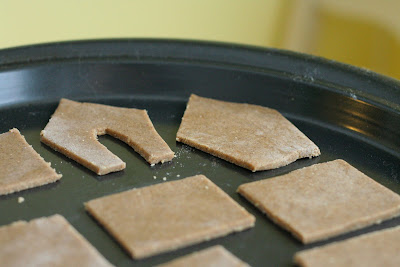
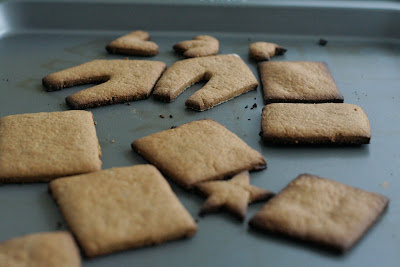
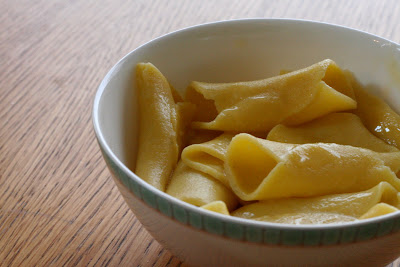
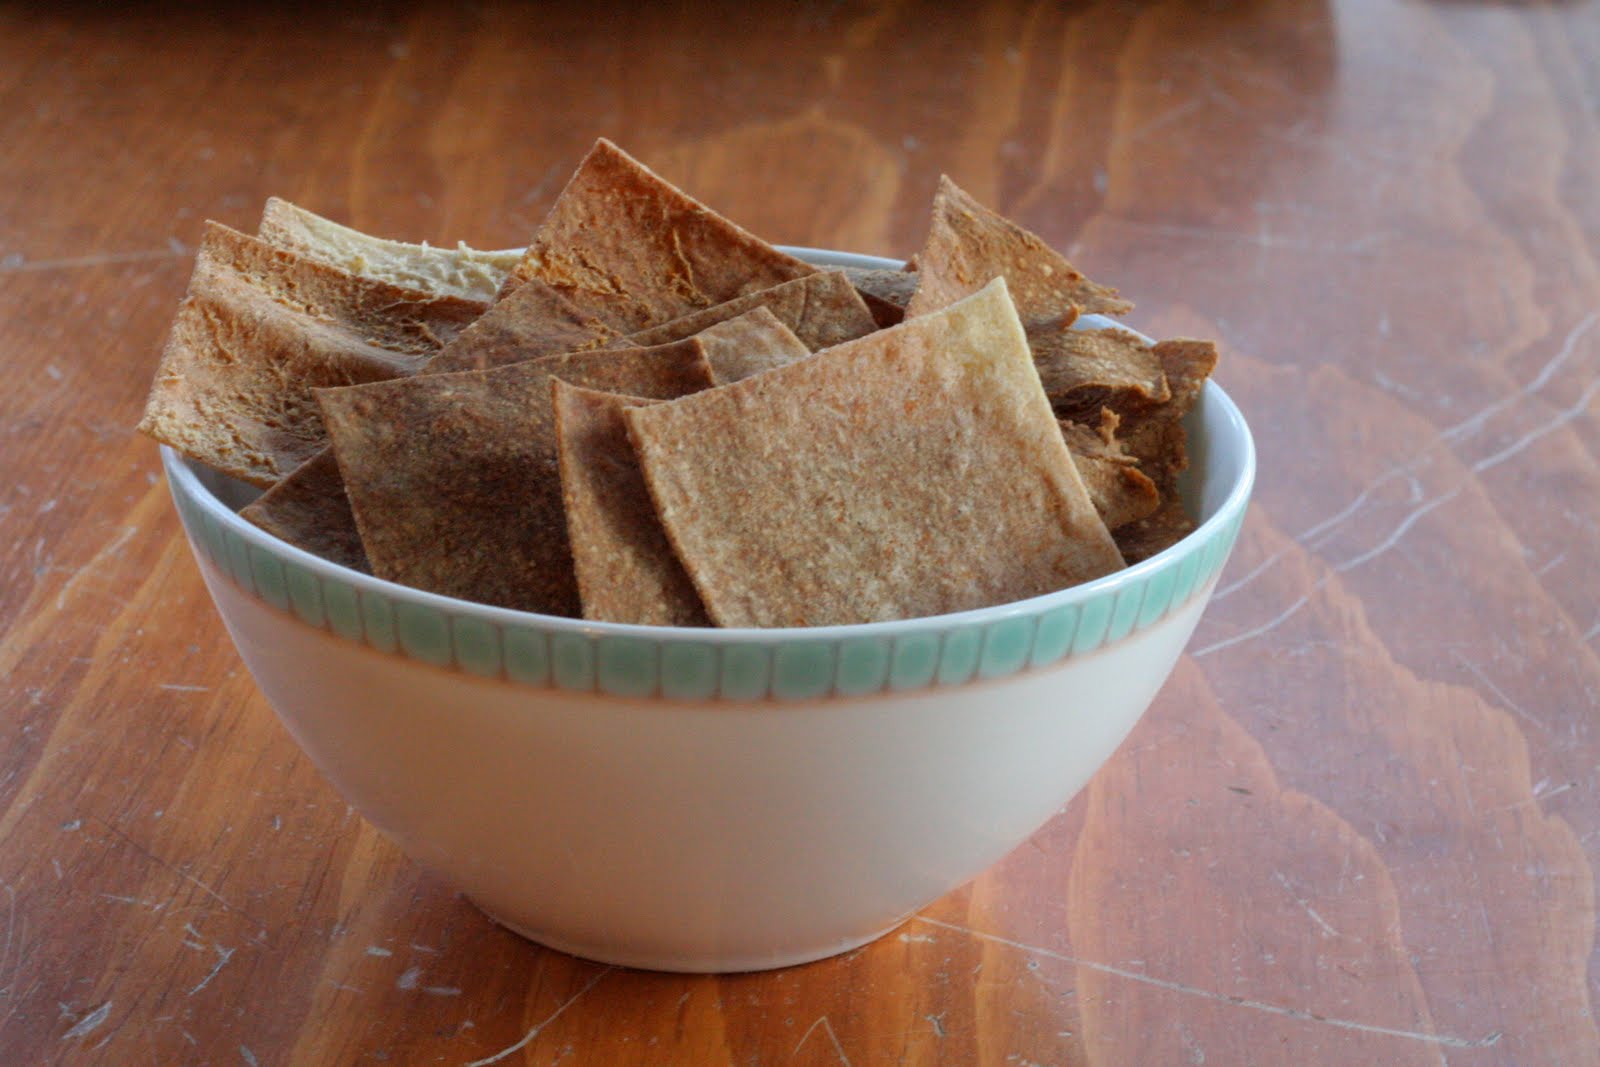
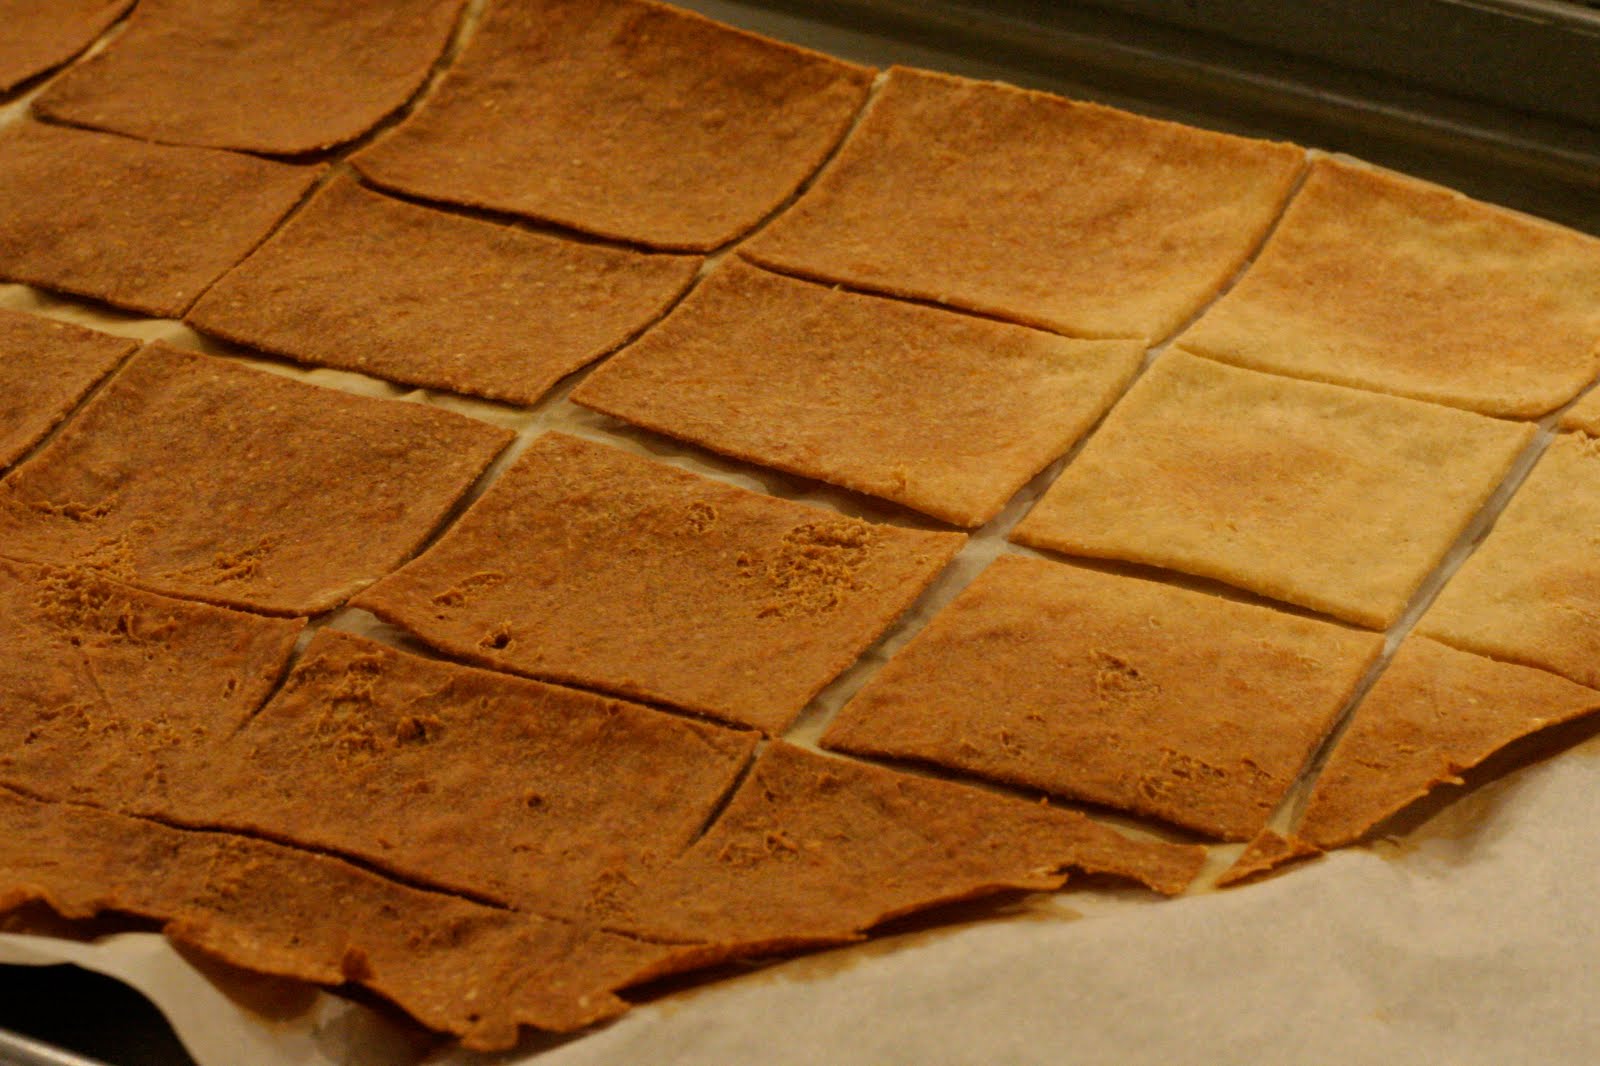
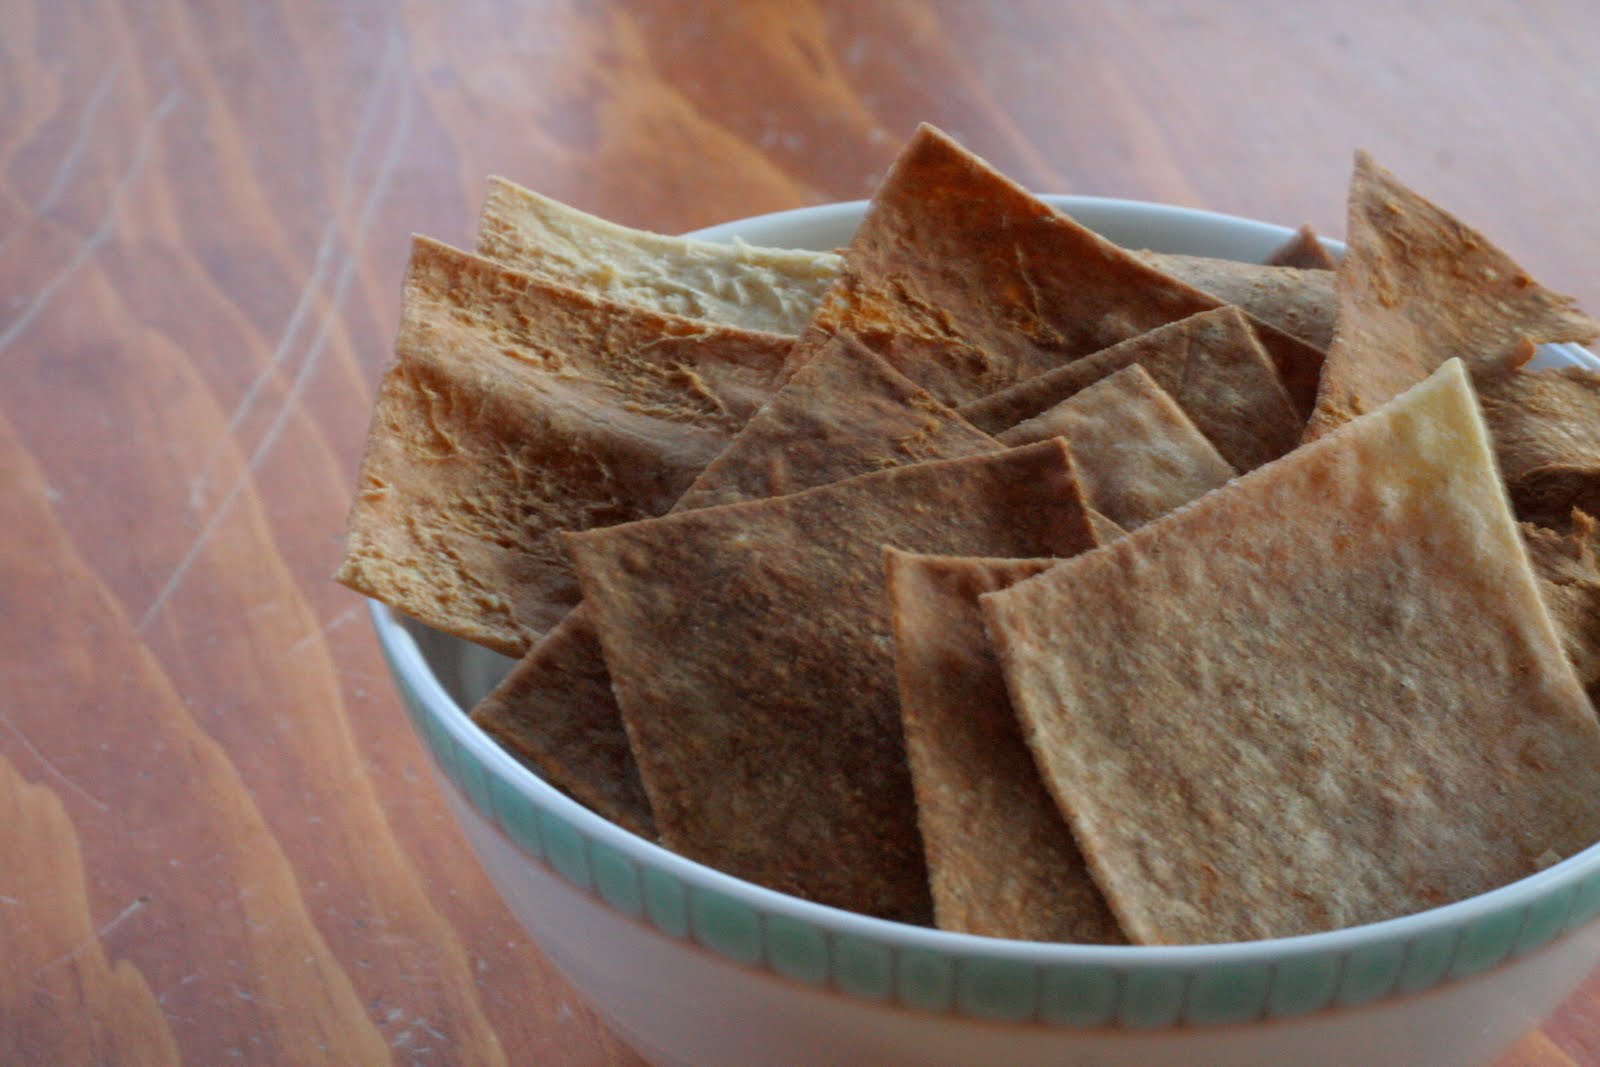
Lavash Ever wondered about making your own crackers?  Try these.  They were originally a Daring Bakers challenge, but I updated the recipe using whole grains, so you get to take your pick!  They are also not too difficult to make, just rise, roll out and bake!

Baking Powder Biscuits These get made often.  They work wonderfully on top of a pot pie or just on their own!

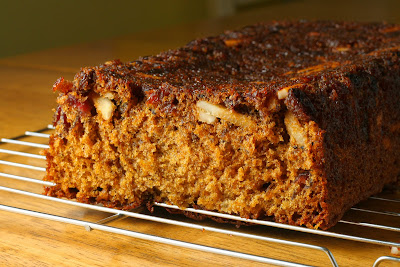
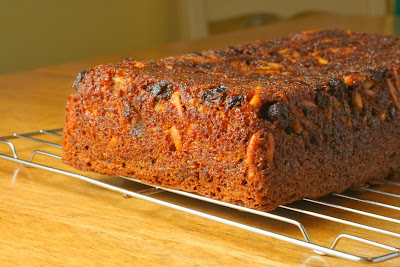
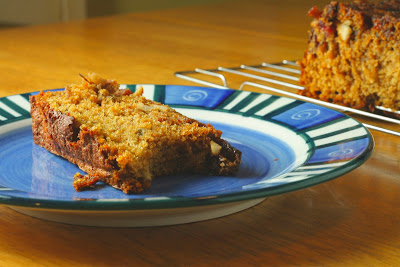
Cranberry Loaf Yes, its a newbie, but its also a goodie.  Leftover cranberry sauce makes the base of this light loaf!

2009 was a good year.  One of the best I've had in a few years.  I've had some energy, I've made lots of amazing food, and I cannot wait for 2010.  More on that later!

xoxo
Lauren

Sunday, December 27, 2009

Cranberry Loaf

This started out as a cranberry bread for stuffing.  When it came out, singed on top and souffle-like in the middle, I wasn't sure what was going to become of it.  After peeling off the burnt top (which came off surprisingly easily), I found a treasure.  You see, this almost burnt bread had a cake-like texture.  It was light and dreamy, and had a wonderful but subtle flavour.  We had to use it for our stuffing as it was the only breadish thing we had, but I knew it was destined for greater things.  A couple of days later I made it again, this time paying attention to the oven (a hot one that I'm not used to using, that cooks pretty fast even when the temperature is decreased by 25 or even 50 degrees Fahrenheit).  I was determined to have this for dessert.  Or with some nice warm tea.  Or just by itself.  And thats exactly what I did!


So maybe you've got some leftover cranberry sauce laying around and nowhere to put it?  Here is your solution!  Its dairy free, and grows very tall in the oven.  After growing tall, it sinks - but don't fret!  It is still the lightest cake/bread I have ever made!  Mom said it was the best one too =D.

This post is linked to Slightly Indulgent Tuesdays and What can I eat thats Gluten Free?

Cranberry Loaf
An original recipe by Lauren of Celiac Teen.
Ingredients
3/4 cup cranberry sauce
2/3 cup sugar
1/4 cup oil
3/4 cup cornstarch
2 tbsp sweet rice flour
1 1/4 tsp baking soda
1/4 tsp xanthan gum
1/2 tsp salt
2 eggs
1 tsp vinegar
1/3 cup raisins
1/3 cup sliced almonds

Steps
1. Preheat oven to 350 degrees Fahrenheit.  Grease a 9 by 5 inch loaf pan.
2. In a large bowl, combine the cranberry sauce, sugar and oil.  Then add cornstarch, sweet rice flour, baking soda, xanthan gum and salt.  Mix.  Add eggs and vinegar to mixture and combine.
3. Fold in raisins and almonds.
4. Pour batter into prepared pan. Bake for 35 to 45 minutes, or until a toothpick inserted in the centre comes out clean.

Note: I used canned whole berry cranberry sauce, but I'm sure a jellied cranberry sauce or a homemade one would do the same thing.  Also, feel free to switch out the raisins and almonds for another dried fruit and nut.

I can't get over its lightness.


When baking (because its so light) the dried fruit and nuts sink to the bottom, creating a luscious anchor to this airy loaf!

I hope that everyone who celebrates Christmas had a fantastic one (I know I did =D)!  Also, I hope you all enjoy the new year, I'm sure it will bring good things!  January is the beginning of lots of new things. I'm continuing the Ten in 10 Challenge, starting a Project 365 (taking a photo everyday for a year) and there are exams of course!  I am very excited and can't wait to see what the new year (or decade, really) brings!

xoxo
Lauren

Twitter and Facebook.

Wednesday, December 23, 2009

Daring Bakers: Gingerbread Houses!

A gingerbread house, you say?  Well the Daring Bakers decided to flow with the season in a historically low participation month.  Y of Lemonpi (a blog I love) and Anna of Very Small Anna (who's blog is adorable) hosted this challenge, and I really enjoyed it.  I haven't done a gingerbread house in years, and even then it was a kit, so this was a treat =D.  Then there was the burning, but we'll forget about that part...

I had many ideas of shapes, but settled on dog houses.  I still have tonnes of dough in the fridge, so we'll see if more come into being soon.

Why dog houses?  Just look at this face:


He's my puppy.  Okay, he's fully grown but I'm still allowed to call him a puppy, right?  I also chose dog houses because he doesn't have one (and a crate just didn't have the same ring to it).  I've also got two kitties (also fully grown).  I caught them while they were sleeping.  Hehe.  She's a cutie.


And getting back to your regularly scheduled Daring Bakers post:

The December 2009 Daring Bakers' challenge was brought to you by Anna of Very Small Anna and Y of Lemonpi. They chose to challenge Daring Bakers' everywhere to bake and assemble a gingerbread house from scratch. They chose recipes from Good Housekeeping and from The Great Scandinavian Baking Book as the challenge recipes.

I love the flavours in gingerbread, but hadn't ever made any from scratch.  I'm so glad I have now.  Its a lot of fun and can become whatever you want it to be =D.

Pictures you say?  Yes.  I've got plenty.  I think I'm slowly becoming better at this.  I don't know.  Daylight helps (which I only had for the first couple of pics)...

Step 1:  Make a pattern.  Just wing it!

Now, cut 'em out all nice.

Then bake 'em.  Just try not to burn.  I sort of did that.

In the beginning, everything was simple in this pet town.


This house, although it recently had a little fire (burnt those cookies.  Whoops), put up a sweet little wreath, and admired the pine cones on the nearby tree.

The second little house, owned by the fearless cat, had a cat silhouette up, to warn the mice to stay away!

Next door was the dog's house, and he did the same, even colouring in some features.

At the end of the street, there was another tree, and a house that just had a nice bit of paint.

Then, one day, Christmas infected this little town.  It started slow, creeping across from one side to the other.  No one knew what was happening, but everyone was extremely excited!

Wreath-house was treated to a string of pomegranate lights!  They oohed and ahed at the jewel-like quality.

The cat house got some life to its roof!  Black and white was the theme, and they even got a fireplace and chimney.  Lets just say:  The neighbours were very jealous.

As the Christmas cheer spread, a tree appeared!  Completely decorated with a glowing star/angel/whatchamacallit at the top!


The dog house (in the background) recieved some mini trees and lights across the side!

The final, plain house got the most treatment:  a red wreath, complete with leaves, and a tree on the inside!  A filled in roof, lights across the top and side and a star!

The other side had even more!  A lovely heart to bring more joy =D.


Christmas had come, and all the little houses jumped for joy.  (Seriously, they aren't attached to the board.  They can jump, slide, anything.)

-

I used Y's recipe, as it had much less flour and looked like it would take less time.  I still took all day, then I decorated, but it was a nice and relaxing process.

I swapped out the 5 cups of flour as follows:
- 1 cup sorghum flour
- 1 cup millet flour
- 1 cup sweet rice flour
- 1 cup tapioca starch
- ~1 tbsp xanthan (I think)

One note about gluten free:  You don't need to rest it.  Since the butter isn't being kept cold the issue is about the gluten!  I found that putting it in the fridge just toughened it up, causing me to have to work it with my hands to make it soft enough to roll out.  Don't get me wrong - this is a tough dough, but when it is cold, its almost impossible to roll when gluten free.

Happy Holidays and Merry Christmas!

xoxo
Lauren

Twitter and Facebook.

Friday, December 18, 2009

A Reintroduction

Exercise.  It used to be one of my absolute favourite things.  But I didn't "exercise" or "work-out", no.  I danced or swam or skied; I enjoyed gym class.  When I got sick, I couldn't do any of these.  At various points when I've felt good, I would try them again.  The problem was that I would assume that my body would be able to handle the same amount of insensity as before.

However, I've been fairly inactive for about 2 1/2 years now.  It is dreadfully hard for me to type that.  I guess I've gotten into patterns, most of which involve a couch.  At points, a good day was one where I went to school (at all), but the second I got home, I'd crash.  TV.  That was about it.  My body simply couldn't handle anything more.

But that's not now.  Now, I have energy.  Not an abundant amount, but enough.  I can bake.  I can stay up a little late and not be a zombie for a week.  I can walk to and from school.  I just want to be active now.  No more being out of breath going up 3 flights of stairs.  No more dizziness from too much exercise.  No more sitting at home while everyone else does a fun activity.  No more.

So there you have it.  I'm a positive person, but sometimes you just have to state the facts.  Exercise and me have not been best friends lately, but I really wish we could.  We're going to start slow though.

Very.


Very.


Very.

S.

L.

O.

W.

Yeah.  As much as I hate to say it, I have to ease in to this.  I cannot over-do anything.  If I do, it will end badly, and I'll be back at square one.  Or rather, a week on the couch.  I'm not even joking.  I went on a little hike a couple of months ago, and I was sick for an entire week.  Sure, I probably also had a cold or something, but I was out of school for 5 days.

As Confucius said "It does not matter how slowly you go as long as you do not stop."  Sometimes it can seem pointless to do anything when you don't see any progress.  So I just have to keep going, in a slow progression in order to allow my body to grow and adapt to this new schedule.

Anyways, this is the plan.  I am going to do some exercise everyday.  I'll start with stretching and 5 minutes of real exercise and a cool down.  See?  I'm starting small.  I have to.  Once I don't lose my breath after 5 minutes, I'll move to 10, then 15, then 20.  I know at a certain point I will get out of breath anyways, but it will be a good out of breath, and I'll continue to grow the length from then, at that point, I'll probably alternate days of cardio with other activities.  This is my plan.


In order to keep me on track, I've joined the Ten in 10 challenge, also known as 10 weeks to Healthy in 2010.  Its a starting point to get me going and make me accountable to someone, or lots of people (also why I'm telling you)!  I'm not going to be doing a big diet overhaul, because weight is definitely not an issue.  I might lessen up on the sweets, but that might just mean bringing more to school, rather than taking away from here.  Of course, that doesn't mean I won't be posting some healthier things too =D.

Also, I'm not going to bombard you with updates on this.  I'll just track where I'm at now and then (maybe on those healthy food posts?).  But I will tell you all the exciting stuff of course!!

Lastly, even though #10in10 (as its called on twitter) begins on January 1st, I am going to start now.    In fact I started yesterday =D.  Winter Break means I have time.  Time to bake, time to cook, and time to exercise.

So there you go.  I am going to do this, and I have.  Once my 5 minutes grows to twenty, I will look at some programs - I have a boatload of DVDs, books, equipment.  This is the return of stamina.  This is exactly what I need.

xoxo
Lauren

PS - If you're interested in joining the Ten in 10 challenge - for any reason - visit this post and talk to Lori!

Twitter and Facebook.

Wednesday, December 16, 2009

Gluten Free Chocolate Almond Wafers

Slice and bake.  They might just be my favourite type of cookies.  You make a batch (or two or three), make a log (or two or three), put them in the freezer and forget about them.  Then, whenever you have a sudden cookie craving, you whip the logs out of that frozen wonderland and chop them.  Then bake and eat!  Although they aren't quite instant from when you make the dough, they are wonderful to make lots of then freeze over the holidays.

For that precise reason, these will be my entry into Holiday Food Fest.  Since this week's theme is holiday desserts, these are spot on.  Why?  Because in the middle of your big food production you can make a batch of these (or even better - slice and bake a couple of them!) and they don't require all that much effort.  In my books, that is exactly what you want in any cookie, holiday or not =D.  This week is hosted by Fishmama at Life as Mom, where there is a lovely apron giveaway.

This post is also linked to What can I eat thats gluten free?, the Holly Bloggy Recipe Exchange and Friday Foodie Fix, and Slightly Indulgent Tuesdays.  And will be my submission to December's Go Ahead Honey, Its Gluten Free event hosted by Stephanie, where the theme is Holiday Cookies!


"I'm addicted to cookies" is what my brother said as he ate his fourth one.  That is the only thing about these cookies.  They're light and delicious.  So there is a chance that they disappear a tad too quickly, but I'm not sure that thats actually a bad thing =D.

Gluten Free Chocolate Almond Wafers
Adapted from Land-O-Lakes.
Ingredients
1/2 cup sugar
6 tbsp butter, softened
1.5 ounces unsweetened chocolate, melted and cooled
1 egg
1/2 tsp almond extract
3 tbsp sorghum flour
3 tbsp tapioca starch/flour
2 tbsp sweet rice flour
1 tsp baking powder
1/4 cup slivered almonds

Steps
1. Combine sugar, butter, melted chocolate, egg and almond extract in a large bowl.  Beat until creamy.
2. In a small bowl, combine flours and baking powder.  Slowly add into the liquid mixture.  Stir in almonds.
3. Shape dough into a 12 inch long, 1 1/4 inch wide log on waxed paper and wrap up.  Refrigerate until firm, 2 hours or overnight.
4. When you want to eat them, preheat oven to 350 degrees Fahrenheit.  Cut log into 1/4 inch slices, using a sharp knife.  Place each slice 1 inch apart on a parchment paper lined cookie sheet.  Bake for 9 to 11 minutes, or until set.  Cool completely.
5. Enjoy!


See?  All cut and cute.  Just make sure that you're using parchment paper/silpat.  These things know how to stick.  I used it for the second half of my log, and they were so much easier to remove!


I heart in-the-oven shots.  C'mon cookies.  You can do it!


See it?  Their starting to stick.  You better use something underneath them.  They taste good either way, but I prefer my cookies intact ;D.


Mmm.  I had some awesome light going on.  Almost gone, but reflecting off snow on one side, and the other - kitchen lights themselves.  Thats why one side is all blue and the other is orange.  I kinda like it.

Anyways, hope you're all enjoying/getting ready for the holidays =D.

xoxo
Lauren

Twitter and Facebook.

Monday, December 14, 2009

Daring Cooks: Salmon en Croute

Lets talk about pastry.  Gluten free pastry to be precise.  In some ways, it is much more difficult than gluten pastry, as the flours don't always work, and you need just the right balance of starch, airiness and flours.  On the other hand, we don't have to fight with the gluten.  No resting, unless you're keeping the fat cold.  Yes, it can crumble but it can also stay together and be more amazing than the gluten-containing one.  After all, it is gluten free!  So lets get to this challenge.  This month, the Daring Cooks made salmon en croute (or beef wellington if they preferred), which is salmon, with a green sauce on top, wrapped in shortcrust (a type of pastry).  Although I waited to the last possible day to make this, I absolutely loved it.  It was just what I needed.  I'm still perfecting a shortcrust recipe to show you, but I highly recommend trying this out, using whatever your favourite savoury pastry is.


The 2009 Daring Cooks challenge was hosted by Simone of Junglefrog Cooking. Simone chose Salmon en Croute (or alternative recipes for Beef Wellington or Vegetable en Croute) from Good Food Online.

With our salmon en croute, I made brussels sprouts.  It was the first time I had ever had them, and I loved them!  Dad said they were the best ones he had ever had.  I think I'll be making those again and again.  The recipe I used was from 101 Cookbooks.  Heidi always has fantastic recipes there.


Nice and simple.


I really wish we had bought more.  I could eat a bowl of these all by myself.


Seriously, they're good.


So, the dough cracked a little.  It was sorta like that when I put it in the oven.  (the crackly skin developed afterwards).  Hey, well at least it tasted okay.


See?  I made dinner.  I love making dinner (once in awhile...)


The obligatory "inside shot".  That green stuff is spinach and cream cheese whizzed in the food processor.  See how the salmon is perfectly cooked?  Yeah.  I really should not be writing this late at night.  I'm starving.  Again.

Thanks to Simone for this challenge, I really enjoyed it!  Its delicious and not too difficult =D.

Enjoy your week!  I cannot believe its almost Christmas.  I've still got about 3 major finals.  And one of the biggest projects this year.  If I go Christmas crazy, that would be bad.  Very bad.  Well, at least I'll have some good treats either way =D.

xoxo
Lauren

Twitter and Facebook.

Wednesday, December 9, 2009

{Festive} Frittata

Holiday Dishes.  Nothing was coming to mind.  At all.  Although it is December, I don't feel like Christmas is coming soon - there's still lots of school, projects, exams, stuff.  So what could I do for Holiday Food Fest? (Which is being hosted by the lovely Shirley this week, so there was no way I was going to miss out!  And there is a giveaway, just so you know).

How about a simple meal.  During the holidays, there isn't only one meal.  You need easy meals and healthy ones as well.  That is why I chose a Frittata.  That, and it happened to be what my friend and I made one night before we had to go back to help at school.  We had a lot of fun, and laughed.  Oh, how we laughed.  I don't know what about, but we were laughing nonstop for forever.  We were laughing so hard that you couldn't hear it.  Our cheeks hurt, our necks hurt, our abdomens hurt, but all in the best way.

Anyways, back to this Fritatta.  It was easy enough, very flexible and simple to make.  Play with flavours, vegetables, cheeses, whatever you have on hand!  And, it was filling.  There is a chance we ate a bit to much (as we ran out the door), but that was half the fun.  Its just kale, spinach, red peppers and button mushrooms, with lots of cheddar and mozzarella.  And some butter.  And of course, the eggs.

This particular one, I don't have pictures of.  For that I am incredibly sorry.  I'll make it again soon, and add pics then!  Not that it was gorgeous, it was just good.  However, because I still wanted some pictures, here are some I snapped of when we were decorating the tree (and house) for Christmas.  Lots of fun =D.

I was given this many years ago by a friends mom.  It must have been in grade three.  Anyways, the gingerbread still has a fabulous scent, and coupled with the dehydrated orange and apple, its one of my favourite memories.

Hehe.  Isn't she a poised little snow(wo)man.

And of course, the stockings.  This one is mine (I know, you never would have guessed!).
-
Feel free to play around with this recipe - different vegetables, cheeses, it's a very personalized dish.  This post is also linked to What can I eat thats gluten free?

Frittata
Ingredients
Butter
Handful (or two) of Kale, ripped/chopped into smaller pieces*
Handful (or two) of spinach
1 red bell pepper, chopped
Butter
Half cup button mushrooms, sliced
1/2 pound (250 g) of cheese, grated
1/4 cup almond flour
5 eggs
Salt and pepper to taste
2-3 tablespoons cream or milk

Steps
1. Preheat the oven to 350 degrees Fahrenheit.  Prepare an 8 inch square casserole dish.
1. Melt butter in a saucepan and saute the greens and red pepper until cooked through.
2. Meanwhile, in a separate saucepan, melt butter and saute the sliced mushrooms, until caramelized.
3. In a bowl, mix the cheese and almond flour.
4. In a separate bowl, whisk the eggs together with the cream/milk and salt and pepper.
5. In a large bowl, combine all mixtures.  Pour contents into prepared dish.
6. Bake 40-50 minutes.
7. Let sit for 5-10 minutes, to set.
8. Eat!!! and Enjoy of course!

*A note on the Kale - It adds a lovely texture, but you should probably break it up.  I found that that it was in only a few pieces in my dish - if you made it into small(ish) pieces, it would give everyone a bite of this yumminess.

Cooking mushrooms that way is how I started to love mushrooms.  Something about them being cooked in butter can do that to pretty much any food.  Whether or not you put them in a Frittata, try them this way at least once.  Its really delicious.

Enjoy your week!

xoxo
Lauren

Twitter and Facebook.

Monday, December 7, 2009

Pasta and Thank You's

Gluten Free Pasta from scratch is no small feat.  It gets dry and crumbly and might not look the way you hoped, but boy is it good.  Heaven on earth is what came to mind after taking that first bite.  Honestly, I may not quite remember what real wheat pasta tastes like (and surely don't know what homemade wheat pasta is like), but I'm pretty sure this is up there with the best of 'em.  At least it is in my eyes.


I used the recipe that Mary of Beans and Caviar provided to us during the Lasagne Daring Bakers Challenge.  That feels like a year ago, and this was the first time I remade it. I just had to add lots and lots of more liquid.  Maybe because my eggs were only large, not extra large, but I just kept adding liquid until it came together.  That meant 9 eggs total and a couple of extra splashes of water and oil.  Other than my eyeballing, I think it worked out wonderfully!  Its funny how revisiting these old challenges can be oddly exciting, and a completely new experience.  Each time I've made any challenge, first or later, it becomes a different thing, but thats part of why I love this.  Honestly, I wasn't re-doing these challenges on purpose, it just sort of happened.  Thats the best type of cooking, at least in my books.  I don't have a recipe for you, as all I did was increase the liquid from that one - but going to this lasagne post will get you the recipe (and the lasagne!).  Just form into desired shapes and cook in boiling water until done (~3 minutes for me).

Some noodles, all wrapped up to look pretty!

As I said - Have fun with your shapes.  I tried out some bowties.

And, some giant penne-ish noodles.  I'm sure there's an italian name for these ones I made up (wrapped around my finger, and they sort of held their shape).

I like it best with some butter on top, and a blizzard of cheese.

The past couple weeks, I've gotten a couple of awards.  Thank you to Basht, Katherine, Liz, and Ninette!  You guys rock!  The first one (X2) is the Over the Top award, which I must answer a slew of questions for, all in one word.  Simple?  Not so much.  There might be a couple-of-hyphens-in-the-answers.  Just saying.

Wednesday, December 2, 2009

Gluten Free Crackers

Recently, a friend reminded me of some crackers I had made a long time ago for the Daring Bakers.  It was for the first gluten free and vegan challenge.  Okay, the only one.  (But there may be a gluten free one soon... so joining wouldn't be a bad idea... hint hint).

Anyways, looking back at that recipe, I didn't love the flours I used.  I'm a bit more into whole grain these days, rather than a mix of all white flours.  So, I'm re-giving you this recipe, all updated and purty.  I know it has to rise and whatnot, but all you do is mix up the ingredients, cover, ignore it for 90 minutes (or more), roll out and cut, and pop into the oven.  Simple stuff.  Nothing confusing.  Just deliciously good.  And completely change-able.


So the formal name for these are Lavash.  They're crisp and good.  The biggest problem I have with them is that I end up eating an entire tray in no time.  They disappear pretty instantly.  I might have to try doubling it.

Since this week in Holiday Food Fest is about Cocktails, Mocktails, and Appetizers, these fit right in!  Crackers are after all, a great accompaniment to dip - a very common (and awesome) appetizer =D.  Head over to Amy's to check out all the other entries (and submit your own!) - there's a giveaway.  These are also linked to What can I eat thats Gluten Free? at Linda's!

Lavash, Take 2
Adapted from the September 2008 Daring Bakers Challenge.
Ingredients
1/3 cup millet flour
1/3 cup sorghum flour
1/3 cup tapioca starch
1/4 cup sweet rice flour
1 tsp xanthan gum
1/2 tsp salt
1/2 tsp instant yeast
1 tbsp agave syrup or sugar
1 tbsp oil
1/3 to 1/2 cup plus 2 tbsp water, room temp.
Any toppings you desire

Steps
1. In a mixing bowl, stir together flours, xanthan, salt, yeast, agave/sugar, oil and enough water to bring everything together into a ball.  You may not need all of the water.
2. The dough should be firmer than French bread dough, but not quite as firm as bagel dough.  In other words, a medium-firm dough.  It should also be slightly tacky.  Lightly oil a bowl and transfer the dough to that bowl, rolling to coat with oil.  Cover the dough with plastic wrap.
3. Ferment at room temperature for 90 minutes or so.  It is supposed to double in size, but do not fret if that does not happen (mine has never doubled).
4. Lay out 2 sheets of parchment paper.  Divide dough in half, then sandwich the dough between two sheets of parchment.  Roll out the dough until it is a paper thin sheet, approximately 15 by 12 inches.  Slowly peel away the top layer of parchment paper.  Then, set the bottom layer of parchment paper with the cracker dough on it, onto a baking sheet.
5. Preheat oven to 350 degrees Fahrenheit with the oven rack in the middle shelf.  Mist the top of the dough with water, and sprinkle with seeds or spices.  Be careful with spices & salt - A little can go a long way!  If you want a precut cracker, use a pizza cutter (rolling blade) and cut your desired shape in the dough.  You don't have to separate the pieces - baking will do that.  If you'd prefer shards, do not score the dough.
6. Bake 15 to 20 minutes, or until crackers begin to brown evenly across the top (time will depend on how thin and evenly you rolled the dough).
7.  When crackers are baked, remove from oven and let cool in pan for about 10 minutes.  You can snap them apart or snap off shards and serve!
8. Enjoy!


So maybe I didn't roll them out perfectly thin.  Its not a crime.  They still taste good =D.

Tada!  I like them best on the same day you make them =D.

So, there you do.  Crackers aren't hard.  Really, they're not!

xoxo
Lauren

Follow me on Twitter.
Become a fan on Facebook.